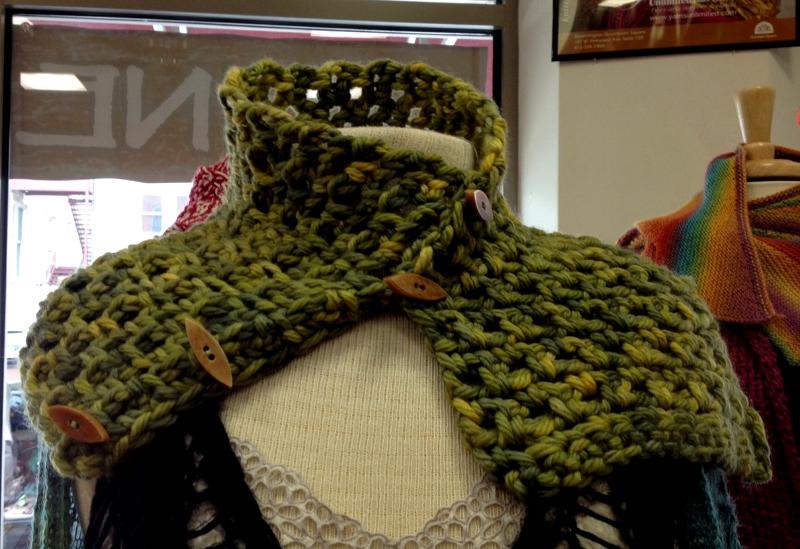
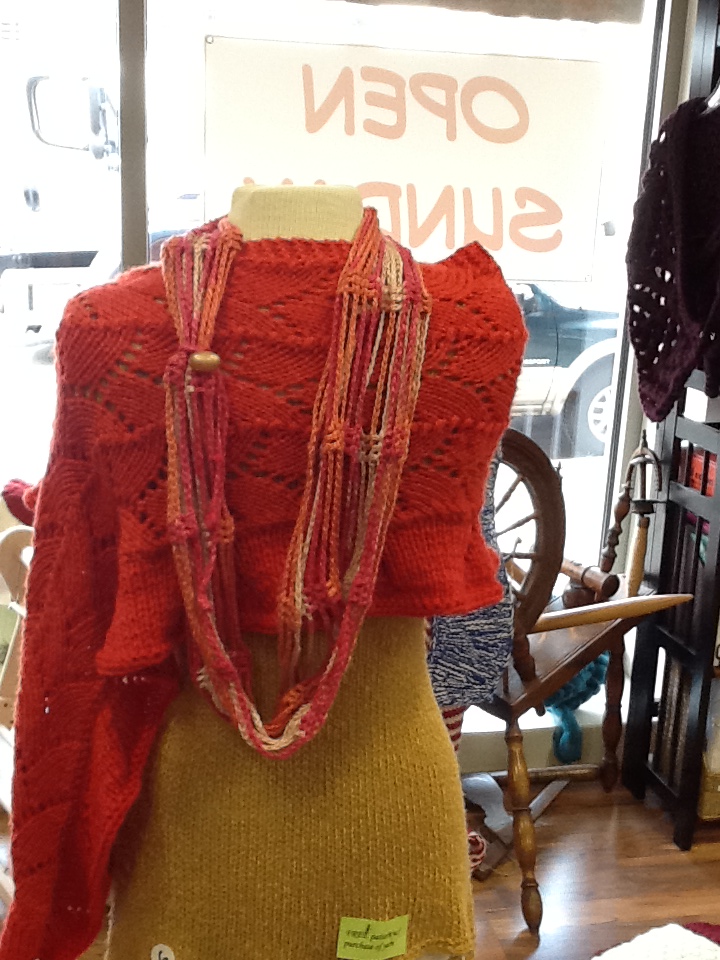
Friday, August 23, 2013

cavalier scarf

Cavalier Scarf 

By Sara Farmer

Chunky, soft, and luscious!  This is an easy repeat that you’ll whip up in a jiffy.  Create an individualized accent for an afternoon out, or a last minute gift to fit anyone.  The scarf can be worn multiple ways—follow your mood!

344Cavalier Red

You’ll need:

  • 100-130 yards chunky yarn

  • Size P crochet hook

  • Buttons

  • Needle and thread

  • Tapestry needle to weave in ends

Gauge

4 pattern repeats = 4 inches (gauge is not crucial in this project)

Crochet the Scarf

R1: Ch
2021.

(Disregard strikethrough from here on out.  I can't seem to turn it off!)


R2: Sc in 2nd chain from the hook and each chain across.

R3: Ch 3, turn.  Skip 1st sc, sc in next sc *ch2, skip 1 sc, sc in next sc*.  Repeat from * to * until end.

R4: Ch 3, turn.  Sc in ch 2 space below, *ch 2, sc in ch 2 hole* to end.

Repeat row 3 until desired length.  Turn.

Last row: Ch 1.  sc in each sc and ch 2 space across.

Finish off, weave in ends.

Sew buttons along short edge.

Cavalier Scarf Printable Version. Be sure to change the beginning chain to 21 instead of 20!

malibu breeze loop

Malibu Breeze LongMalibu


Malibu Breeze Loop

By Sara Farmer

Wear this breezy necklace long and airy, or wrap it close for a chunkier look.  You’ll love the process and result of this quick and simple project!

You’ll need:

  • 2 skeins of Plymouth’s Linen Concerto, or 200 yards of dk yarn

  • Size G crochet hook

  • Stitch markers

  • Decorative button (for optional embellishment adapted from Tamara Kelly of mooglyblog.com)

  • Tapestry needle


Pattern Notes

  • To change the size of the loop, add or subtract a multiple of 17.

  • If adding the optional embellishment, save approximately 11 yards of yarn to crochet it or make it before you make the loop.

  • When making the initial chain, place a marker every 50 stitches to help yourself count chain stitches.

  • On round 2, it is helpful to place markers designating where you’ll dc.  Make the first 3 dc, skip 14 chains, place marker in the 15th.  Then *skip 16 chains, place marker in the 17th.*  Continue from * to * until loop is marked.  Then continue with pattern.


Crochet the Loop

R1: Ch 167, sl st to 1st ch to join the loop (be careful not to twist).

R2: Ch 2, dc through both loops (here and throughout round) of the 1st chain, then dc in next 2 chains.  (see 4th pattern note above) *ch 15, skip 14 chains below, dc in each of next 3 chains.*  Repeat from * to * until end.  Dc in  1st dc.  (NB: If you end the round with the wrong number of chains, don’t worry!  Still chain 15, then dc in the beginning dc.  Or add/subtract a chain or two to keep it from bunching.)

R3 till end: Continue working in  a spiral.  Dc in each dc from round below, chain 15 between.  Continue until you run out of yarn, get to desired width, or get distracted by your next project!  (don’t forget to save your 11 yards of yarn for the embellishment if you haven’t already)

Finishing: Tie off and weave in ends.  Block, dry, and wear!

NB: When you stop and restart, double check to make sure you’re going the right direction in the spiral.

Optional Button Embellishment

(adapted from pattern by Tamara Kelly of mooglyblog.com)

1.  Thread button onto the remaining yarn.  Chain for 10 inches.

2. Slip the button down close to the hook, and skipping over the button, sl st in the in the 2nd ch from the hook (trapping the button in the loop).  Sl st back along ch for approximately 1.75 inches, or until this sl st section is long enough to fit around cowl when doubled, with a little bit of tension.

3. Ch 7 sts, or long enough to create a loop that fits tightly around the button.  Sl st in the same ch as last sl st, sl st in next 2 ch.

4. Ch to slightly shorter than remaining unworked ch.  Break yarn and finish off ends.

5. To wear, slip button behind cowl and pull it toward the front.  Pass button through loop made in step 3.

Malibu Breeze Loop Printable Version

mariposa stole

Mariposa Stole
By Sara Farmer

These lovely butterflies will wrap you in elegance! Beading is optional, but accents the delicate bodies of the butterflies. The pima cotton/silk yarn provides a touch of warmth on a cool evening, while still cool enough for summer nights. You can choose to crochet armholes into the stole to slip it over your shoulders.

cropped-mariposa.jpg

Mariposa Stole

You’ll need:
 2 skeins of Misti Alpaca Tonos Pima Silk, or about 630 yards of dk yarn (solid color recommended)
 Size G crochet hook
 Stitch markers
 20 grams of 6/0 seed beads
 Beading needle
 Tapestry needle
Gauge
3dc + 1 butterfly = 3.5” long x 2.5” high
NB: The finished garment will stretch when worn. See finished measurements to make adjustments to size.

Finished Measurements

Stole is 20 butterflies long and 7 butterflies tall. With some stretch, this measures 18” wide x 82” long finished.
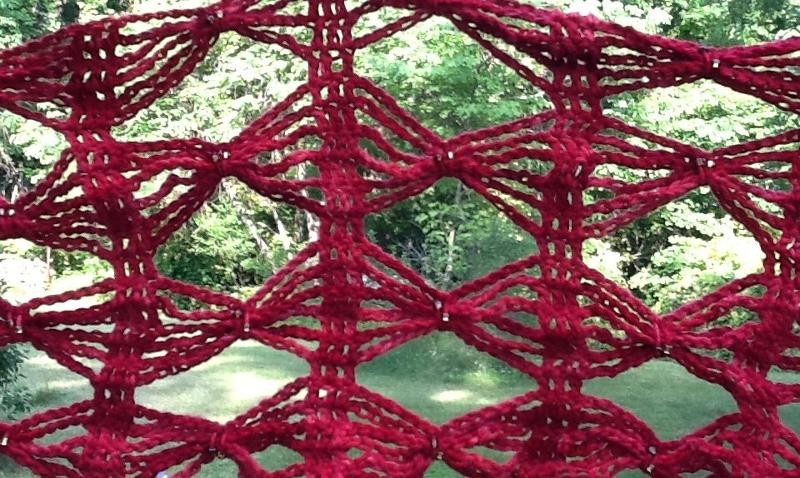
Pattern Notes

- The butterflies are created by a 6 row repeat. The first 5 rows repeat a 3 dc, chain 15 pattern. In the 6th row, you will chain half the row, then use a sc to bind the chains of the 5 previous rows together, then complete the chain. You’ll crochet the beads in place on this single crochet.

- The optional armholes happen after the third row of butterflies. Make note before you plunge forward!

- A note on joining yarn balls. Be sure to join at a double crochet section, not along the chains. Also remember to restring enough beads on the new ball to finish the project.

- To change the size, add or subtract a multiple of 18 from starting chain.

Prepare the Beads

String about 160 beads or 11 grams of beads onto the 1st ball of yarn

Crochet the Stole

R1: Chain 365, placing marker every 50 chains as you go to help count.
R2: Starting from 2nd chain from the hook, place marker every 18 chains until 3 chains left. Returning to the begin-ning of the row, dc in 2nd ch from hook, and in next 2 chains. *ch 15, dc in next 3 dc after the marker.* Repeat from * to * until end of row.
R3: Ch 2, turn. Dc in each of next 3 dc. *ch 15, skip 15 chains below, dc in next 3 dc.* Repeat from * to * until end of row.
R4-5: Same as row 2
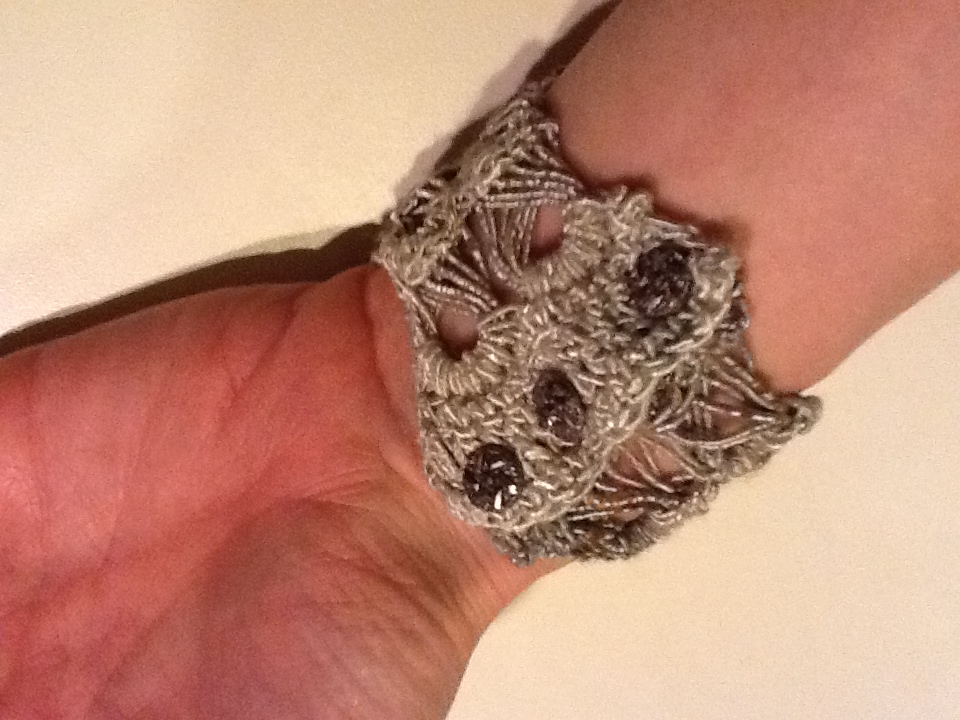
R6: Ch 2, turn. Dc in each of next 3 dc. *Ch 7, slide a bead close to the hook. Gather the 5 rows of chains from be-low, insert your hook underneath them, and draw up a loop underneath the 5 chains. Slide the next bead up snugly against the working stitch. Yarn over and draw through both loops on the hook. (NB: Beads will appear on the opposite side of the work.) Ch 7, dc in each of next 3 dc.* Repeat from * to * until end of row.
R7-11: Repeat row 2.
R12: Same as row 6.
Continue this 6 row repeat until you have 7 rows of complete butterflies (or 42 rows). Fasten off, and weave in ends.
This stole loves to be blocked, please do!

Optional Armholes
(inserted after you’ve completed the 3rd set of butterflies or 18 rows)

R19: Place a marker on the 1st dc after the 7th butterfly and the 1st dc after the 12th butterfly. Follow directions for row 2 until you reach the marker. Do not dc; chain 3 instead. Continue the pattern (ch 15, 3 dc) until you reach the next marker. Do not dc; ch 3 instead. Continue the pattern until the end of the row.
R20: Ch 2, turn. Dc in each of next 3 dc. *ch 15, skip 15 chains below, dc in next 3 dc.* Repeat from * to * 4 times. Ch 15, skip 15 chains below, dc in next 3 chains. *ch 15, skip 15 chains below, dc in next 3 dc.* Repeat from * to * 4 times. Ch 15, skip 15 chains below, dc in next 3 chains. *ch 15, skip 15 chains below, dc in next 3 dc.* Repeat from * to * end of row.
R21-23: same as row 2.
R24: same as row 6.
Remaining rows worked the same as rows 7-12.

Mariposa Stole Printable Version

chain cowl

Sunday, August 11, 2013

tunisian summer scarf

photo (5)

broomstick lace cuff

photo (8)photo (7)


Broomstick Lace Cuff


Yarn: 1 skein Seduce or Captiva  (1 skein will make more than 1 cuff)

Hook: size F

Broomstick: size Q/16mm or larger crochet hook =OR= size 35 or larger knitting needle (you’ll just need 1 needle) =OR= get crazy and try an actual broomstick!


Notions: tapestry needle, thread needle, thread, 3 small buttons


Foundation: chain 16

Row 1: sc in 2nd chain from hook, and in each chain to end. This is the right side. (15 sc)

Row 2: DO NOT CHAIN OR TURN.  Move yarn to back of work.  Working from left to right, draw up the loop currently on hook.  Place it on broomstick, and pull taut.  *Draw up a loop through back loop only of the next sc.  Place loop on broomstick.* Repeat from * to * until end of row.  (15 broomstick loops)

Row 3: DO NOT CHAIN OR TURN.  Move yarn to back of work.  Working from right to left, place hook through first 5 broomstick loops, and slide them off.  Draw up a loop through all 5 broomstick loops, then draw another loop through it (slip stitch made; you can now pull all the loops off the broomstick).  *Working through the same 5 loops, 5 sc through the broomstick hole.  **Place hook through next 5 broomstick loops.  5 sc through all 5 of the next broomstick loops.**  Repeat from **to** one more time.  (15 sc, 3 broomstick lace clusters)

Repeat rows 2 and 3 six more times (7 rows of broomstick lace).

Rows 16-17: chain 1, turn.  sc in each sc across.

Row 18: chain 2, turn.  dc in each sc across.

Row 19: chain 1, turn.  sc in each dc across.

Fasten off and weave in ends.

Sew buttons evenly across starting end of the cuff on the right side.  Buttons should be small enough to fit through holes between the double crochets at opposite end.